오픈 소스 e-commerce 소스인 saleor를 설치 해보고자 한다.
Saleor – A headless, GraphQL-first, open-source e-commerce platform
A headless, GraphQL-first e-commerce platform delivering ultra-fast, dynamic, personalized shopping experiences. Find out why developers love it.
saleor.io
Demo Page
Manual
Welcome to Saleor Documentation | Documentation – Saleor Commerce
Here you’ll find everything you need to start working with Saleor.
docs.saleor.io
데모에서 보면 알겠지만, 왠 만한 쇼핑몰보다 괜찮다.
또한 화려한 스펙
headless, GraphQL-first e-commerce platform
Saleor requires Python 3.8, Node.js 10.0+, PostgreSQL and OS-specific dependency tools.
화려한 기술 스펙과 맞물려, github 기반으로 현재 v2.11까지 release 된 상태고 꾸준히 성장 중이다.
단점이라면... 인도쪽 기반 오픈 소스라서 그런지.. Document는 개판... 아니지.. 정말 poor 하다.
우선 기본 구성은 다음과 같다.
Saleor - backend (Django)
StoreFront - Mall UI (React)
Dashboard - Admin UI (React)
The current stable version is 2.11 and you should use this version for all three components:
- Saleor: https://github.com/mirumee/saleor/releases/tag/2.11.1
- Dashboard: https://github.com/mirumee/saleor-dashboard/releases/tag/2.11.1
- Storefront: https://github.com/mirumee/saleor-storefront/releases/tag/2.11.0
설치
OS : ubuntu 18.04 기반
Document에는 Docker or Windows 이지만, Linux (Ubuntu) 기반으로 설치 진행하려고 한다.
1. Backend Server Saleor 설치
1) 사전 환경 설정
sudo add-apt-repository ppa:deadsnakes/ppa
sudo apt-get update
sudo apt-get -y upgrade

sudo apt-get install python3.8 libpython3.8-dev python3-all-dev

sudo apt install virtualenv
sudo apt install postgresql
sudo apt install uwsgi
sudo apt-get install build-essential python3-dev
2) 필수 Library 및 NPM 설치
# Required for 2.11 and above.
sudo apt-get install libpangocairo-1.0-0

### Setup Node
### insatalling node.
sudo apt install npm

## installing NVM
curl https://raw.githubusercontent.com/creationix/nvm/master/install.sh | bash

source ~/.profile
source ~/.bashrc
nvm install v12

sudo apt-get install apache2-dev
pip3 install mod_wsgi
3) Source Code Clone
### Setup Code
mkdir -p codes/backend
cd codes/backend
virtualenv -p python3.8 venv
source venv/bin/activate

## git clone
git clone -b 2.11 https://github.com/sncap/saleor.git

## version 확인
cd saleor
git branch
* 2.11
4) Python Package 설치
pip install -r requirements.txt
5) DB 설정
setting up Postgres user
### settiing up postgres user.
sudo su - postgres
~$ psql


# in a db
CREATE ROLE saleor WITH LOGIN PASSWORD 'saleor';
CREATE DATABASE saleor;
ALTER USER saleor WITH SUPERUSER;

GRANT ALL PRIVILEGES ON DATABASE saleor TO saleor;
ALTER USER saleor CREATEDB;


# Drop table
# DROP DATABASE saleor;
postgres=# \q
\q

~$ ougout
logout
6) 초기 설정값 및 계정 생성
## Export these variables to os.
# setup (public IP) EXT-IP 34.64.xx.xx,
# ValueError: Cannot add amount in 'KRW' to 'USD'

export ALLOWED_HOSTS=34.64.xx.xx
export ALLOWED_CLIENT_HOSTS=34.64.xx.xx
export DEBUG=True
export SECRET_KEY=123456
export INTERNAL_IPS=127.0.0.1,34.64.xx.xx,
export DEFAULT_COUNTRY=KO
export DEFAULT_CURRENCY=USD
export ALLOWED_HOSTS=34.64.xx.xx,*


### Applying migrations
 python manage.py migrate

## create dummy data
 python manage.py populatedb

## Create superuser
 python manage.py createsuperuser


## Account 설정
email : admin@example.com
password : ******
7) Run Server
## runserver
python manage.py runserver 0.0.0.0:8000
8) 설치 확인
browser 접속
http://34.64.xx.xx:8000/graphql/
graphql 확인 테스트
query {
  products(first: 10) {
    edges {
      cursor
      node {
        id
        name
      }
    }
  }
}
입력 후 실행
결과가 잘 보이면 성공, 오류시... 다시 재설치
2. Saleor Front 설치
1) git Code Clone
## git clone code
git clone -b 2.11 https://github.com/sncap/saleor-storefront.git storefront

#version 확인
cd storefront/
git branch
* 2.10
2) Package Install
npm install
3) StartUp script 수정
package.json 에 "--host 0.0.0.0" 추가
vi package.json
...
"start": "cross-env NODE_ENV=develop webpack-dev-server --history-api-fallback --watch --host 0.0.0.0 --port 3000 --mode development --hotOnly",
...
4) Run Front
설치 서버의 URL을 env에 export 해줘야 함.
export API_URI=http://34.64.xx.xx:8000/graphql/
export BACKEND_URL='http://34.64.xx.xx:8000/'

npm start
5) saleor Front 접속
3000 port로 접속
3. Dashboard 설치
1) code Clone
cd ~/codes

git clone -b 2.11 https://github.com/sncap/saleor-dashboard.git dashboard

cd dashboard
git branch
* 2.11
2) Package Library 설치
npm install
3) StartUp script 수정
# --host 0.0.0.0 추가
vi package.json
...
"start": "webpack-dev-server -d --host 0.0.0.0"
...
4) Dashboard 실행
export API_URI=http://34.64.xx.xx:8000/graphql/

npm start
5) Dashboard 접속
9000 port로 접속
http://34.64.xx.xx:9000/
# login
email : admin@example.com
password : ******
이상이면 설치 끝
설치된 인스턴스가 3개 (backend, web, Dashboard) 인데..
이를 관리하기 위하여, 프로세스 매니저 PM2를 설치함.
PM2 - Home
Advanced process manager for production Node.js applications. Load balancer, logs facility, startup script, micro service management, at a glance.
pm2.keymetrics.io
0. 실행스크립트를 위한 환경 변수 저장
$ vi ~/.bashrc
...
export ALLOWED_HOSTS=34.64.xx.xx,*
export ALLOWED_CLIENT_HOSTS=34.64.xx.xx
export DEBUG=True
export SECRET_KEY=123456
export INTERNAL_IPS=127.0.0.1,34.64.xx.xx,
export DEFAULT_COUNTRY=KO
export DEFAULT_CURRENCY=USD
export APP_MOUNT_URI=/dashboard/
export API_URI=http://34.64.xx.xx:8000/graphql/
$ source ~/.bashrc
$ echo $ALLOWED_HOSTS
34.64.xx.xx,*
1. 실행 Script 만들기
1) saleor (Backend API Server)
$ cd ~/codes/
$ vi run_api.sh
source ~/codes/backend/venv/bin/activate
cd ~/codes/backend/saleor/

python manage.py runserver 0.0.0.0:8000
2) Mall UI (storefront)
$ vi run_storefront.sh
cd ~/codes/storefront

npm start
3) Dashboard (admin UI)
$ vi run_dashboard.sh
cd ~/codes/dashboard/

npm start
2. pm2 설정 하기
0) pm2 설치
PM2는 아래와 같이 Node.js의 패키지 매니저(Package Manager)인 NPM으로 쉽게 설치할 수 있습니다.
# PM2 설치
$ npm install -g pm2@latest
1) pm2 process 설정
pm2 start run_api.sh
pm2 start run_storefront.sh
pm2 start run_dashboard.sh
2) process 상태 확인
pm2 status
pm2 list
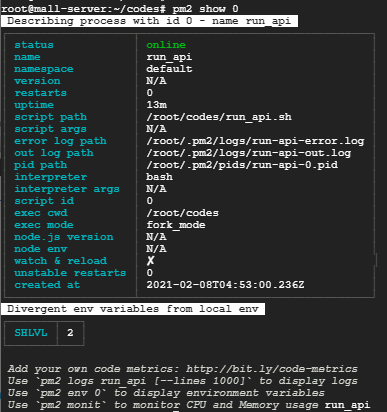
3) Process 상세 확인
# pm2 show {id}
pm2 show 0
4) 그외 PM2 명령어
# pm2 명령어
$ pm2 start   config.js
$ pm2 restart config.js # 정의된 프로세스 재시작
$ pm2 reload  config.js # 정의된 프로세스 설정 다시 불러오기
$ pm2 delete  config.js # 정의된 프로세스 삭제

# pm2 프로세스 관리
$ pm2 stop all # 모든 프로세스 멈추기
$ pm2 restart all # 모든 프로세스 재시작
$ pm2 reload all # 모든 프로세스의 다운타임을 0으로 설정후 다시로드

$ pm2 stop 0 # 프로세스 0번을 멈추기
$ pm2 restart 0 # 프로세스 0번을 재시작
$ pm2 delete 0 # 프로세스 0번을 삭제
$ pm2 delete all # 프로세스 전부 삭제

$ pm2 ping # pm2가 사용가능한지 핑확인
$ pm2 updatePM #pm2 업데이트
$ pm2 reset <process> # 리셋 후 메타데이터 리로드

#로그관리
$ pm2 logs #모든 로그 출력
$ pm2 ilogs #자세한 로그 출력
$ pm2 flush #모든 로그 비우기
$ pm2 reloadLogs #로그 다시불러오기